
While perusing the aisles of my local dollar store recently, I came across a package of 8 tiny bottles of glitter in the nail art section. My initial thought was that they would be perfect for adding some sparkle to small projects. Thinking about it further, I realized they would be perfect to turn into pixie dust necklaces. Give these as gifts or as party favors for kids and teens. You can even make them into less-girly “wizard amulets” by using dark or neutral colored glitter (like copper), a black ribbon and silver or black beads – perfect even for boys.
Project estimate:
- Nail art glitter bottles, package of 8 for $1
- Ribbon, on hand or $0.50 and up
- Beads, on hand
- One head pin for jewelry, on hand
- Pliers, on hand
Total: $1 and up
The bottles of glitter used for these necklaces can be found in the nail care/nail art section of Dollar Tree in a package of 8 (seen below)
Please note: These bottle are very small so they are not appropriate to give to children who still put things in their mouths. You may also want to consider gluing the lids onto the bottles depending on the age and activity level of the recipient.

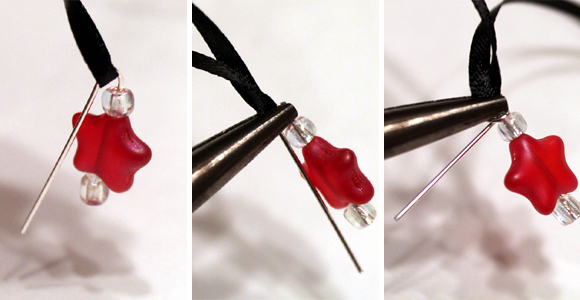
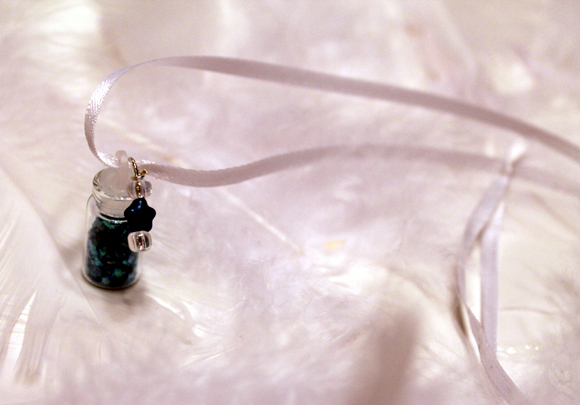
Step 1: Make the charm
Select beads that coordinate with the glitter and ribbon you will be using. String the bead(s) onto the head pin. Make a loop to attach the charm to the necklace as follows:
- Leaving some space above the top bead, bend the head pin down with pliers. (now is a great time to go ahead and loop it around the ribbon instead of threading the ribbon through later)
- Grasp the top of the bend with your pliers.
- Using your hand or a second set of pliers, wrap the end of the head pin around the top of your charm.
- Clip off the excess and use pliers to press against loop.
(disclaimer: I am a super novice jewelry maker. If you have more experience or a technique that works better, by all means, do that!)
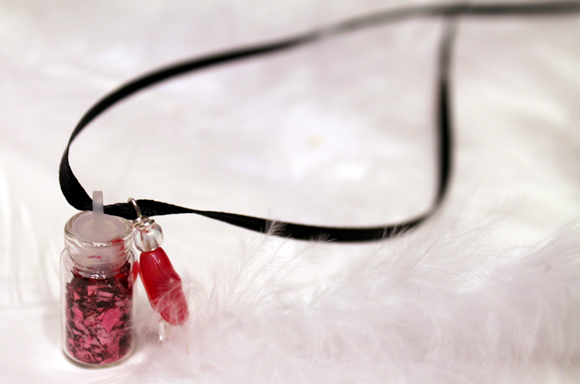
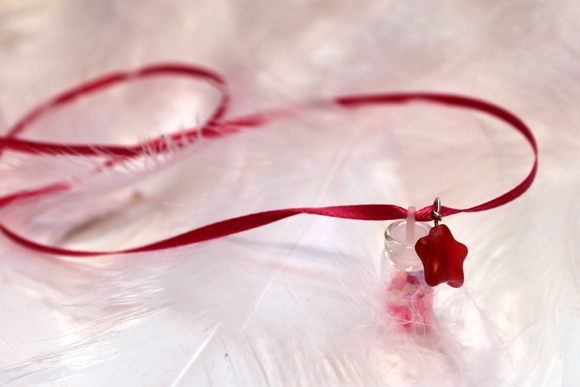
Step 2: Add the glitter
String your favorite bottle of glitter onto the ribbon with your charm.
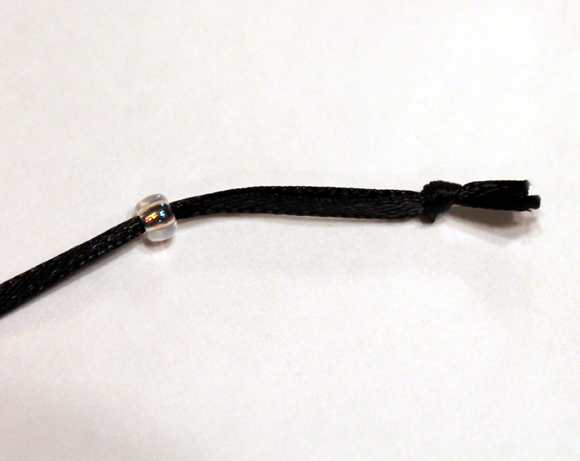
Step 3: Make the necklace adjustable
I chose to make my necklaces long enough to easily slip over the wearer’s head. You can finish your necklace with a bead to make it adjustable by threading both ends of the ribbon through a snug fitting bead (mine is an “E bead”) before tying a knot. This will let the wearer slide the bead to adjust the length of the necklace if desired.
That’s it! Making these necklaces is quick and fun. You can coordinate your glitter color based on the occasion (just empty the bottles and refill with your glitter of choice): Make pink and red necklaces as valentine’s gifts. Use green for St. Patrick’s day. Or create an assortment for a pixie party and let each child pick their favorite color.
Here are some more examples of ways to make your necklaces:


10 Comments
Steph @ Crafting in the Rain
Super cute! I recently made a pixie dust glass-bulb ornament for our tree, and I love this idea too!
Fire
I’ve always loved projects using tiny bottles! My only question is, what are these particular bottles made of? I saw them before but through the packaging thought they looked like cheap (thin) plastic. Is that the case?
Shannon
This is adorable!!!
Shannon
This is adorable!!!
carissa
The bottles I used are made of glass with a plastic stopper
Rachel
Looks similar to pixie dust necklaces I’ve seen at the Renaissance Festival. Only difference is theirs have tiny corks instead of plastic toppers. Very cool!
stephanie
Made these today! Wish I could upload a picture for you.