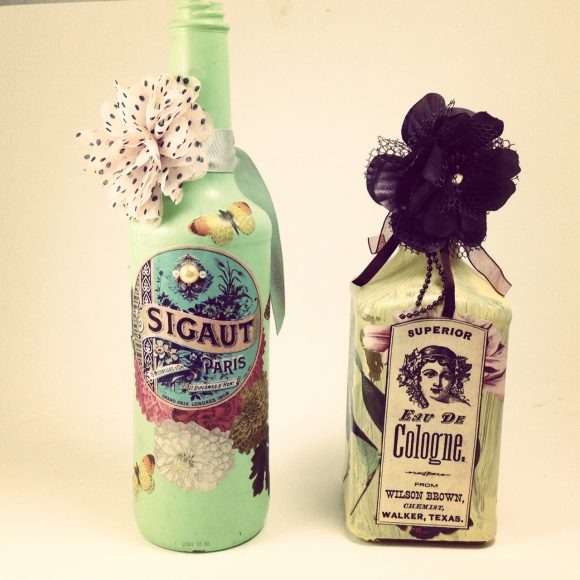
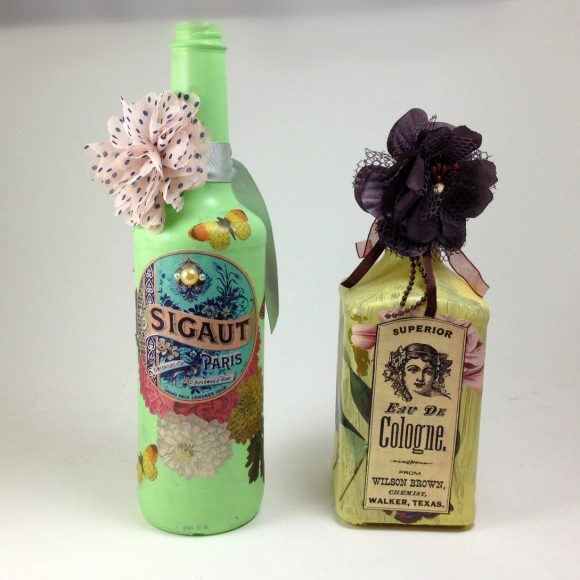
I always hesitate before I put glass bottles in the recycling. They just seem so useful — there must be some way to reuse them! For this month’s 12 Months of Martha project, I decided to recycle some glass bottles into pretty decoupaged bottles – you can use them for vases or just as home decor accents. For this project, I used products from Martha Stewart’s new premium decoupage line.
Project Materials:
- Recycled bottle, on hand
- Acrylic paint, on hand or $1 and up (I used Martha Stewart craft paint)
- Floral cut outs, on hand or print out from TheGraphicsFairy.com (I used a combination of Martha Stewart decoupage papers and printed out some free Graphics Fairy labels)
- Decoupage glue, on hand or $5 and up (I used Martha Stewart Decoupage Multi-Surface in Matte Finish)
- Embellishments such as ribbon, flowers, rhinestones, etc., on hand or $1 and up
- Paint brush
Total: FREE and up, depending on your supply stash

How to Make a Decoupaged Bottle
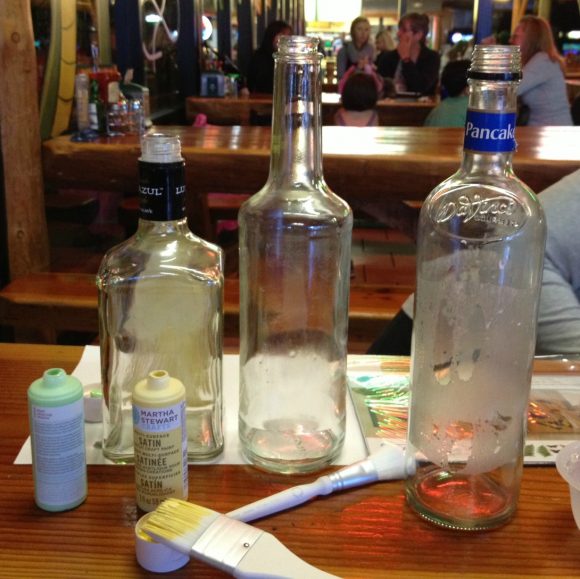
1. First, you want to clean the labels off the bottles. I soaked my bottles in water for 15 minutes and then peeled the labels off. That worked well for two of the bottles, but not so well for the last bottle (as you can see). It depends on the adhesive used on the labels. To get the adhesive gunk off, you can use a label remover like Goo Gone (Find small bottles of it at the dollar store!).
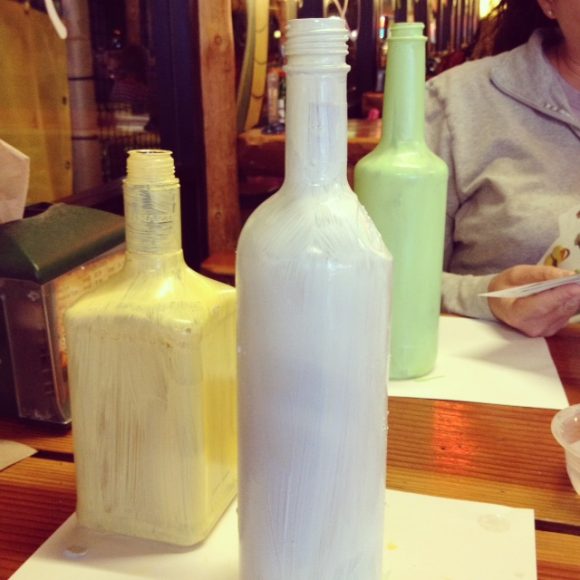
2. Make sure the bottles are clean and dry, and then paint them. I used Martha Stewart Crafts acrylic paint. Let the first coat of paint dry completely, and then give the bottle a second coat. Allow all paint to dry before you move on to the next step.
We went to a local kids’ play restaurant and let our kids play while we worked on this project!
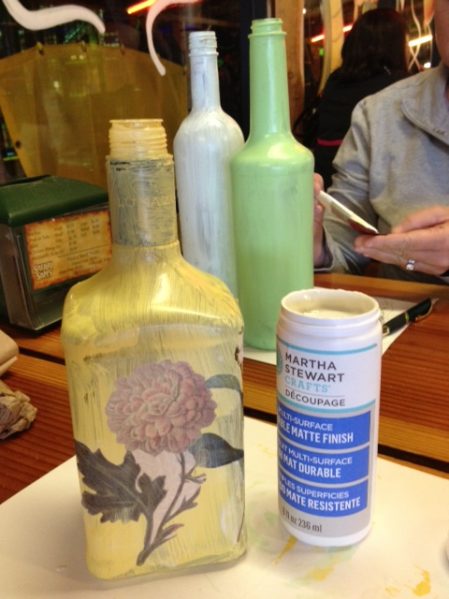
3. After paint is completely dry, start adding decoupage elements. I decoupaged flower and butterfly cutouts from the Martha Stewart Decoupage line onto the bottle. You can also use basically any images you want – magazine clippings, gift wrap, tissue paper, book pages, or print from Graphics Fairy.
I paint a thin layer of decoupage glue on the back of the image, then stick it to the bottle. Then I paint a layer of decoupage glue over the top of the image.
TIP: If you have trouble with wrinkling or bubbles, don’t paint over the image until the glue on the back of the image has dried. This will minimize bubbling and wrinkling.
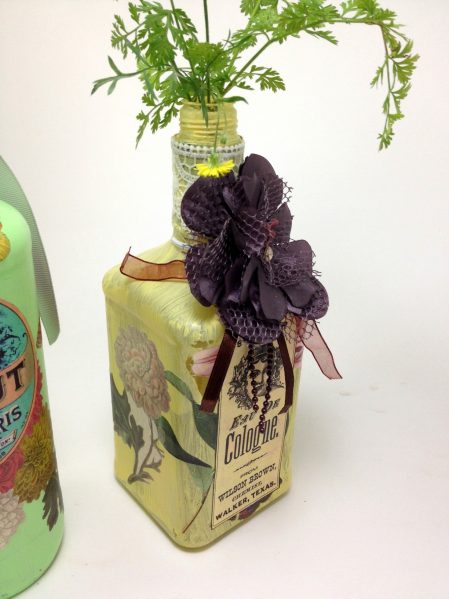
4. Add other embellishments (like lace, ribbon, flowers, or rhinestones) as desired.


5 Comments
JUDY IN TEXAS
Love your botttles. Did you sell the bottles at a craft show? If so, did the bottles sell well and for how much?
Thanks,
Judy
heather
@Judy, No I didn’t sell them, but if I did, I would price them at around $10.
Laura A
Nice. I actually have some antique bottles that I would like to”spiffy” up and give as gifts&this is the perfect idea. Mainly need ed to know how to get started and this is the perfect simple solution. Thanks.