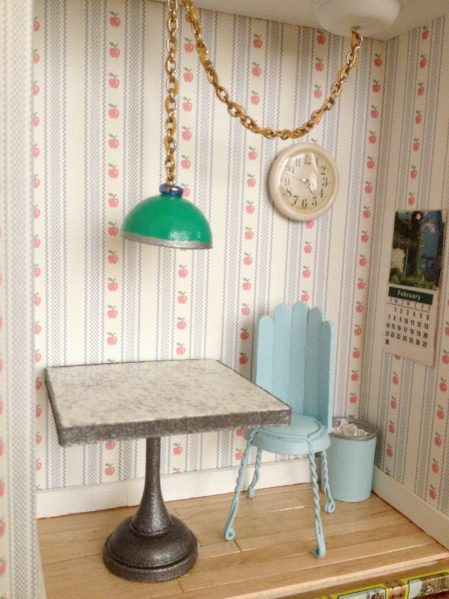
It’s been a while since I made any new dollhouse miniatures, but recently I was inspired by some random odds and ends of junk and now I am back on a mini-making roll! My tiny rooms were in desperate need of some furnishings, so that’s where I started. Wanting to keep a retro feel to this room, I decided to make a classic piece of vintage furniture: The sparkly Formica table. And you won’t believe how easy it was!
Project estimate:
- Chipboard, on hand
- Golf tee, on hand or $1
- Vending machine capsule, on hand or $0.25
- Glue, on hand
- Spray paint, on hand or $1 and up
- Craft paint, on hand or $1 and up
Total: Free and up!
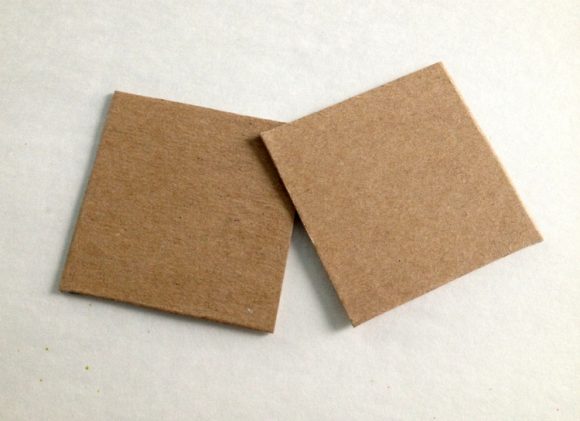
Start by deciding on the shape and size of your table. I went with a square measuring about 2 1/4 inches. Cut two of the shape out of chipboard or other heavy cardboard. (I used the stiff backing from a used-up legal pad.) To make the table extra sturdy you will glue the two pieces together. For mine, I covered one surface on each of the squares with contact cement, let it dry, and then pressed the pieces firmly together.
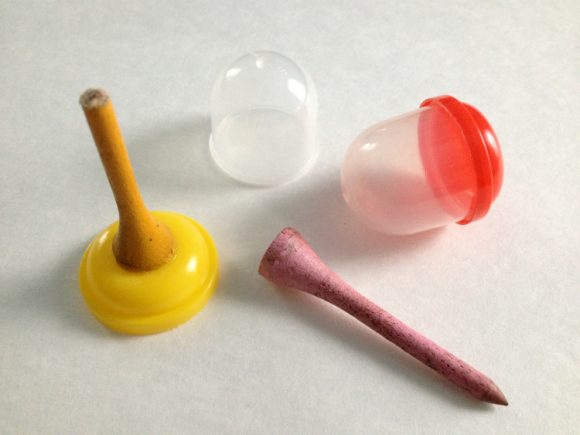
To make the base of the table, you will need a golf tee and the lid from a vending machine toy capsule. (This is where my obsession with gumball machine rings and toys comes in handy!) Cut the pointed tip off of the golf tee and glue the top of the tee to the plastic cap as shown, making sure the pieces are well-centered. (Don’t throw away the rest of the capsule – next week I will show you how to turn it into a tiny basket!)
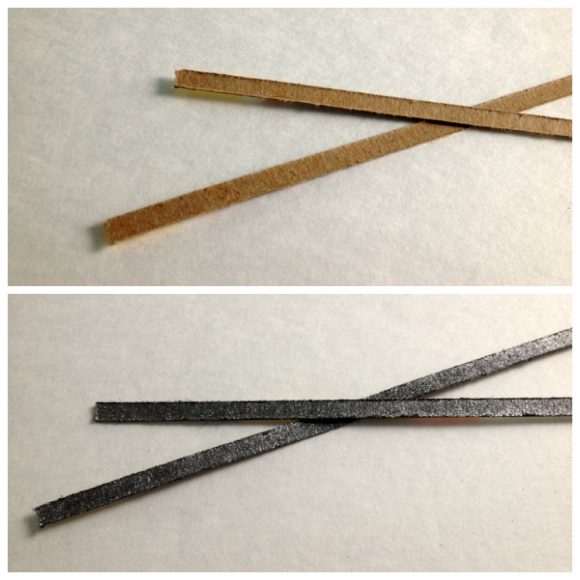
Cut a strip of cardboard (I used an old cereal box) that is just wider than your stacked and glued pieces of cardboard and long enough to wrap all the way around the edges. Using metallic spray paint, paint both the cardboard strip and the table base.
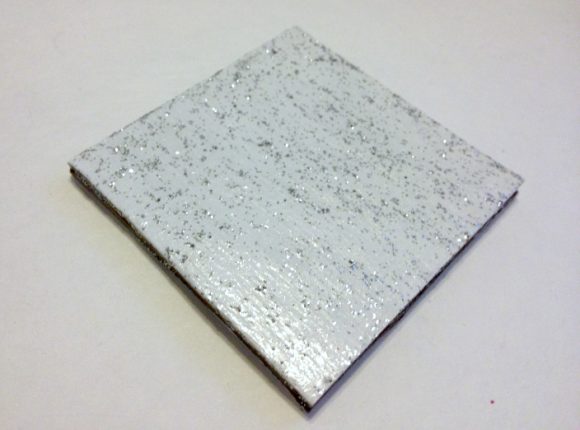
To make the tabletop look like Formica, first I painted it with a couple coats of white craft paint. After that was dry, I went over the surface with silver glitter paint (I used Martha Stewart glitter craft paint). If you want your tabletop to look super-shiny, you can seal it with clear spray enamel in a gloss finish, glossy Mod Podge, or even clear fingernail polish. I used spray enamel because I found it to be the quickest and easiest.

When the paint on the tabletop is completely dry, carefully glue the thin strip around the outside edge. Work slowly and methodically to make sure there are no gaps between the tabletop and the strip of trim.

All you have left to do is glue the two pieces together! For this, I suggest using a dab of hot glue or other fast-drying, strong-bonding glue, so that you don’t have to sit holding the pieces in place for an extended period while you wait for it to dry enough to be stable on its own. I glue my miniatures in place so I know that my table won’t topple, but you can also glue metal washer into the bottom of the table base to give it weight and add stability.
Want to make the rest of the tiny things in this room too?
- Chair (tutorial coming soon!)
- Pendant light
- Wall clock
- Calendar
- Wastebasket
Lots more minis are coming soon! What kind of tiny, dollhouse-size things would you like to see next?


6 Comments
Stephanie
Oh man this reminds me of the doll house as a child. So cute!
Penny
(shh… this would be a good project for those Formica samples you can get at Home Depot….)
rhonda
@Penny, you are a genius! (I think I actually might have a few tucked away along with a stack of paint chips from back when we were contemplating a kitchen remodel!)
wilfwolf33
Do you have a tutorial on a doll bed? Oh and I love your dollhouse!! So cute! ;)
Serena
Thanks for another clever dollhouse idea!