
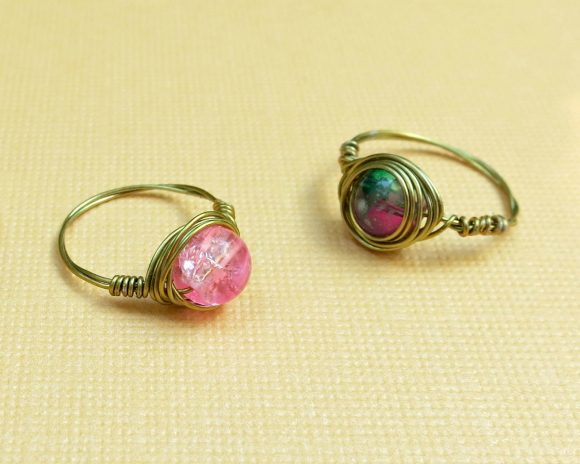
I’m going to warn you right now that this project is addictive! Once you get the hang of it you won’t want to stop making these beautiful wire wrapped bead rings. They’re quick to make, and I ended up making almost a dozen in just an hour. This project would make a pretty last minute Mother’s Day or Teacher Appreciation day gift. This is also a great group project for tweens and teens to make.
I used $1 bead bags and wire that I found in the craft section of Walmart, which makes this project really affordable for large groups.

Project Estimate:
- Beads – $1
- Craft Wire – $1
- Ring Sizer (optional) – on hand or $2.50
Total: $2 and up
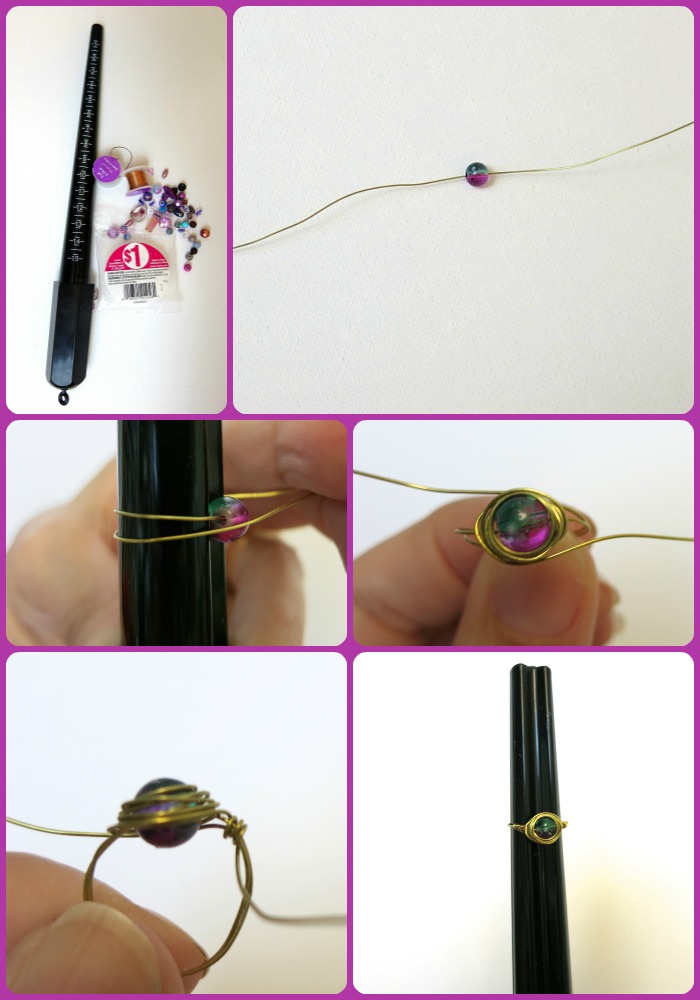
Step one: Cut a 12 inch length of craft wire and place the bead in the center.
Step two: You can use a ring sizer if you have one, or use a dowel rod or other cylindrical object. Place the bead on the ring sizer and wrap each wire around it once.
Step three: Take the ring off the sizer. I tried to do this next step on the sizer and the wire kept sliding off the bead. I got much better results when I took the ring off the sizer. Begin wrapping each of the wires around the bead, kind of like winding the hands on a clock. I went counterclockwise, but you could go either direction.
Step four: Leave about an inch of wire on each side. Wrap that bit of wire around each side of the bead. I found this step easier to do with jewelry pliers. I then pressed the end of the wire in firmly with the pliers, or you could cut the end if it is sticking out.
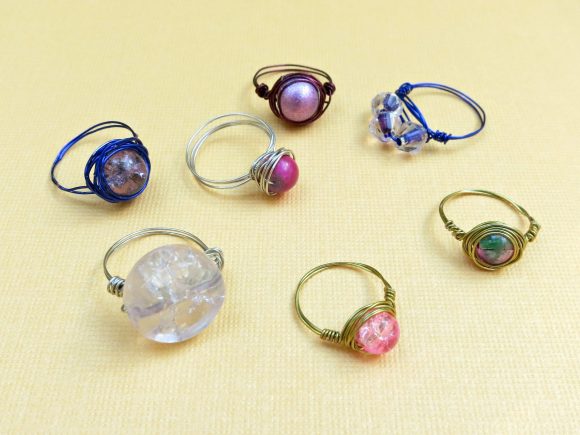
Aren’t these wire wrapped beads pretty? Don’t get discouraged if the first few don’t turn out perfectly. I had to make several before I got the hang of it. Once you figure it out you’ll be hooked! Then you can start experimenting with different sized beads and with putting more than one bead on the wire. Have fun crafting and creating.


1 Comment
heather
ooh, I can’t wait to make these! I am going to get a ring sizer today!