Continued from page 2
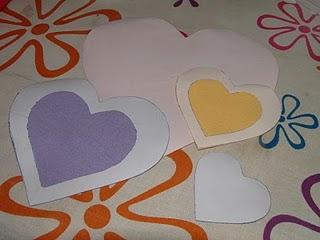
5. Make your applique! Now we’re to my favorite part. Trace your pattern onto the papery side of some Heat’n Bond Lite. (There are other products out there that will work for this…but this the one I’m most familiar with.) Keep in mind that your design will up reversed (a mirror image of) your original design. For this heart and a lot of other patterns it won’t matter. It definitely matters if you’re doing letters though, so be careful. I traced the biggest heart by itself and then traced the three smaller hearts one on top of the other.
Carefully cut out the smaller hearts from the insides of the larger. When you’re done with this step, you should have solid heart shapes for the biggest and smallest hearts and hollow heart shapes for the middle two hearts. Iron your Heat’n Bond Lite adhesive side down, PAPER SIDE UP onto your fabric.
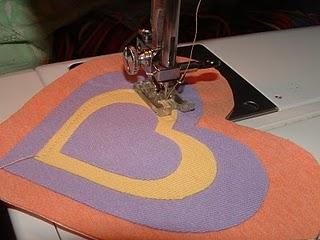
Peel the paper backing off the three smaller hearts, but DO NOT take the paper backing off the largest heart yet. Arrange the three smaller hearts on top of the biggest one so they’re evenly spaced. I would probably iron them one at a time, and then add the next layer. Iron well.
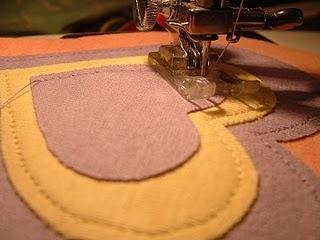
Now you’re ready to stitch. I used matching thread because I had it on hand. I wouldn’t go out and buy new thread for a project like this. If you don’t have matching thread, it can be decorative to use a different color. Since all the layers are securely stuck to each other at this point, it doesn’t matter which layer you stitch first. I think I started with yellow because there was already yellow thread in the matchine. I do as much of the stitching on the applique as I can before putting the applique on the shirt. This way, there are as few threads as possible rubbing the skin through the shirt and less chance of the ends coming undone.
Continue sewing until all three smaller hearts have been sewn.
For each line of stitching, I made sure to leave the ends extra long, so I could pull them through to the back and tie a knot rather than stitching back and forth to secure the ends. This will give your applique a cleaner look. You want to make sure to tie the knot several times on the back though and pull them tight because I have occassionally had one come undone after many washings.
Go to page 4 for more


5 Comments
Kathy Haynie
Great ideas, Polly! Thanks for all the (cheap!) inspiration.
Mich L.
Wow, those are brilliant! I love that this is a great craft for girls or boys!
amy
love it! however your link to page 6 from 5 is broken :(
heather
@Amy, thanks, I fixed it!