
Today’s MSCE project is fused plastic bags AND the backpack I sewed them into. I found some colored (and scented) trash bags at the dollar store that I picked up to fuse because I thought it’d be super-fun to have a bunch of pink fused plastic fabric to make into something. The dollar store also had blue trash bags.
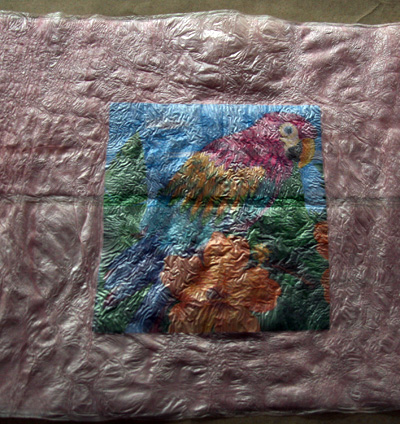
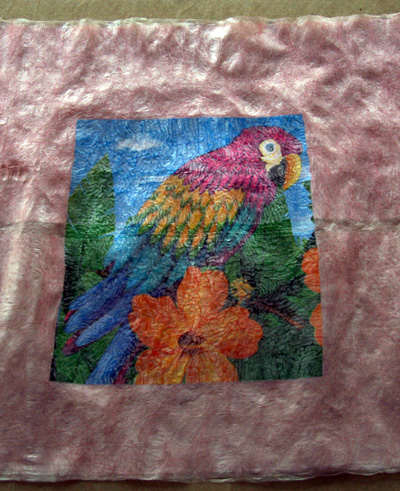
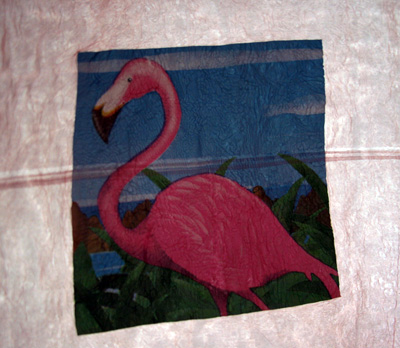
I also found a plastic Luau door decoration that I wanted to try to fuse to the pink plastic bags. Using pre-printed plastic duds from the dollar store has a lot of potential! You can use printed party decorations, plastic tablecloths, etc. to include in your fused plastic creations. The only important thing to remember with printed plastic is that you have to cover the printed part with another layer of plastic before you iron because the ink needs to be covered or else it will get everywhere.

I’ve wanted to try fusing plastic bags for the longest time, and I messed around with it a couple weeks ago to disastrous results. The Etsy Labs instructions for fusing plastic said you can use freezer paper to iron the plastic between, but guess what – you can’t! Freezer paper’s plastic coating melts to the plastic and to itself, and while it makes an awesome medium for creating sturdy mailing envelopes, it doesn’t yield usable fused plastic! I actually commented on the tute to ask them to update the info on their instructions (since their tutorial is the number one return from Google for “fused plastic”), but judging from the two hundred spam comments on that entry, they neither read nor screen their comments. Bummer for them!
If this is your first time fusing plastic, just know that it takes a few tries to get the process to work well. Hang in there!
Project Estimate:
- Plastic trash bags, $1
- Plastic Luau party decoration, $1
- Iron, on hand
- Large paper grocery bag, on hand
Total cost: $2
You can also use recycled plastic grocery (and other) bags as well.
To Fuse Bags:
Prepare: Cut up a large paper grocery bag, and cut into two equal pieces. Use one piece to cover your ironing surface (I use my wooden kitchen table because the hard surface works well for fusing plastic). Heat your iron to medium (I use one notch below “cotton”), no steam. Use in a ventilated room (although, as long as you aren’t burning the bags, there shouldn’t be any fumes).
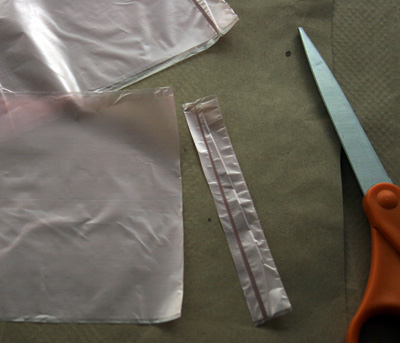
1. Cut bottom off of plastic bag.

2. Open plastic bag halfway. Once opened halfway, it’s folded quarters longways, so that makes it 4-ply. You want at least 8-ply for fused plastic, so you will want to repeat the process to cut and open another trash bag.

3. Sandwich a piece of the luau banner between the two trash bags. Place remaining paper grocery bag piece over plastic, making sure to cover all the plastic. Iron smoothly over the whole area of plastic, not stopping the iron in one place. Continue for 10-15 seconds.
4. Pick up top piece of paper and peel fused plastic gently off of it. Turn plastic over, and cover with paper again. Repeat ironing process again.
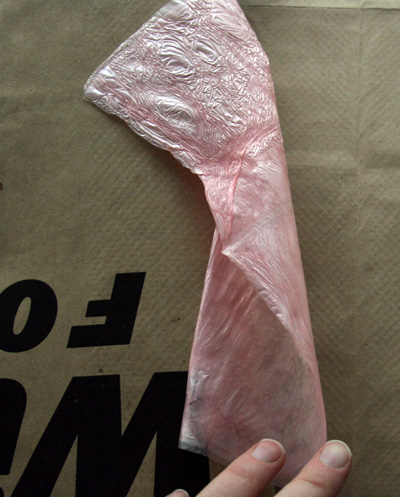
This is the fused plastic after two passes of ironing. It’s not ready yet. You can tell because it’s bumpy and it looks bubbly. You will want to repeat the ironing process on each side and check it again. Repeat until your fused plastic looks smooth and sturdy.
Here the fabric is much better, almost finished. The whole ironing process takes about five minutes per sheet.
Look how translucent and pretty this is when it’s held up to the window. It would be a really cool “stained glass window” project for kids!
Make many sheets and sew them together. Use them as you would fabric!
The Backpack:
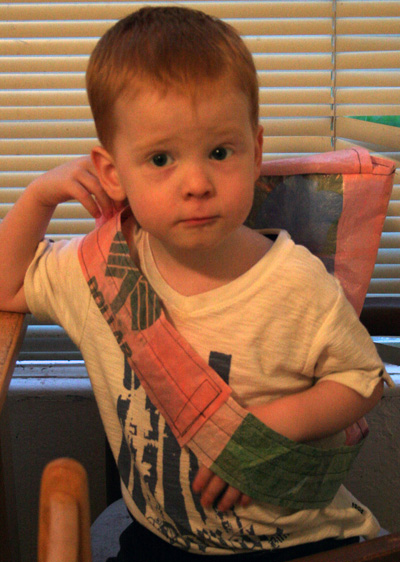
For the backpack, I made one over-the-shoulder strap big enough for my two year-old to fit in (doesn’t fit on me!). To make the straps, I took one ironed sheet and folded it into thirds and then sewed down the middle and around the perimeter. I sewed two together (see the box formation connecting the two pieces) to make the strap long enough. I put a cut out from my dollar store on one of the sheets I used for the strap just to represent! :)
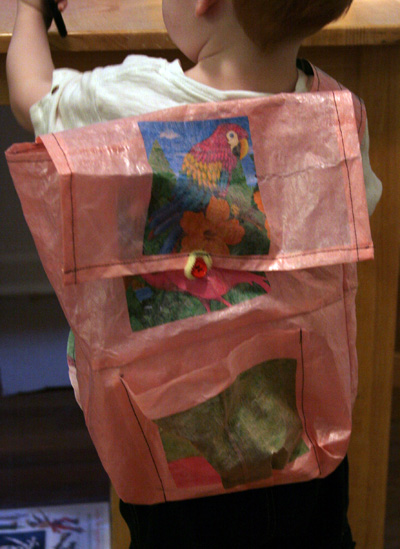
I sewed two ironed sheets together to make a larger sheet and used one of these sets for the front, and one set for the back of the backpack. I used a single ironed sheet for the flap on the backpack. I used a small sheet I made (folded a single bag in half once it was opened to its four-ply state) as a pocket on the front of the backpack.
Assembly:
1. Sew larger sheets (2).
2. Sew pocket on one larger sheet.
3. Sew straps.
4. Sew straps onto the other larger sheet.
5. Fold over 3 sides of one regular sized sheet for the flap. Sew around 3 sides.
6. Put flap right side together with top of back piece (the one with the strap). Sew across the top of the flap.
7. Put front and back piece right sides together (tuck strap in well so you don’t accidently sew across it!). Sew around sides and bottom.
8. Sew gussets in bottom of bag. See this tutorial (step 3) for more info on sewing gussets.
9. Fold top of backpack over 1/2 inch and sew around top (make sure flap is tucked inside backpack while you sew).
10. Turn inside out. You’re done!
Optional backpack closure:
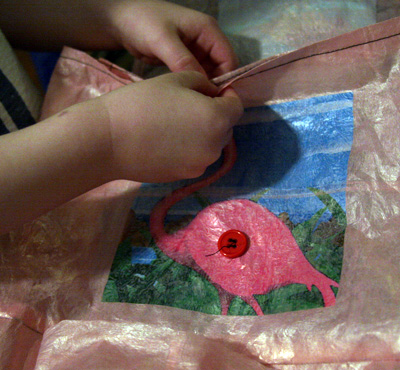
1. Sew a ponytail holder to center of flap.
2. Sew button onto body of backpack near where the ponytail holder naturally reaches.


24 Comments
Rachel
This is awesome! I am so intrigued with fused plastic. I might have to give this a shot. I’ll be linking.
Betty
I love the details. Now I can make it!
jatoha
Great tutorial! I’ve made several things with fused plastic, my favorite use is for a kids re-usable lunch bag!
I wanted to comment that I fuse between two sheets of parchment paper. (The kind you line cookie sheets) It’s non-stick, so it works well.
Stephanie
What size garbage bags did you use to make this
This is a great idea. can’t wait to try it.
Paula Clare
LOVE! LOVE! This is a great idea…and perhaps the best fused plastic tutorial I’ve seen yet! WOOT!
Asia Anderson
well im just an 11 year old but i absolutly love this!! i just wanted 2 let u know that u have inspired me and alot ofmy adult friends like my G.S leader and mom,etc. so once again…THNX!!! hahaha XD im gonna have fun with doing this :3 hope all that try this do 2!!
Nicole
Great idea. Thanks for the tutorial.
I know it’s not always as cute as this, but I’ve only seen this technique as a way to RECYCLE all those shopping bags that are everywhere. Takes one more dollar off the cost too.
heather
@Nicole Thanks! Yeah, I have only seen it as recycling too (except for Make’s excellent video tutorial, where they use black trash bags), but I liked having a big supply of pretty-colored bags to use. I really only used about 1/3 or fewer of the bags, so it was really more like $.33. If you look closely at the pic where you can see the strap, you’ll see I used a recycled bag from my dollar store – kind of a shout out to the dollar store and also a nod to recycling. I guess I like the colored trash bag idea as a supplement to recycled bags. You can overlay them on your recycled bags for a bit of color!
Sam
I think the project is great, but its better if we use plastic bags that were already used instead of purchasing bags specifically for a project? The whole point of fusing plastic is to help our environment by taking things we normally throw away and turning them into something useful, lessening the amount in landfills. I think it is counter productive to purchase garbage bags for this…we would be better off buying fabric really.
No offense, just a thought.
Mandi
This is neat! But I have a question about sturdiness, how sturdy is it? Have you “measured” how much it can hold? I am just curious, before I get my Cub scouts to gather plastic bags to recycle, I wanted to know what to expect with the end product so they are not disappointed. Thanks!!!
heather
@Mandi I haven’t measured it – maybe make one first and test it out yourself! My 2yo just uses it for toys, etc! :) I wouldn’t use it for textbooks, probably!! :)
Pixeltrash
I’ve never heard of fused plastic, but it looks pretty cool! I think it would make great recycled, reusable grocery bags for gifts for people. I have to look and see what I can find. Thanks for the instructions!
Holly
Thank you so much for this!! I have been trying to fuse plastic after finding it on Threadbanger but I have had only mediocre results. I love the backpack and am ready to try again.
jenxo
Oh great tutorial, what a wonderful idea to use plastic decs to get the great designs ….. ive been recently fusing and painting plastic too, am just loving it… it has such a great fabric to work with…jenxo
http://jenxo.blogspot.com/
Lauren
That’s a great idea using those plastic decorations in there.
Also wanted to say your kid makes me laugh in that picture! He looks like he’s trying to be a model! haha
tracy hite
i love the idea of using disposable bags to make reusable items i love to upcycle and create new things, and even if you make a mistake a melt a whole in your plastic dont throw it away, just add it to another fused sheet and it will begin to look like leather especially if u use beige grocery bags, great idea adding the plastic door hangings, i never would have thought of that on my own!
Jenn
Can you throw this fabric in the wash? I would like to combine it with fabric as a liner, or a backing on a blanket of recycled jeans or something.
heather
@Jenn, you probably can put it in the wash, although you might need to forget the dryer and hang or lay dry.
Carla
Do you have to use plastic in the middle too? Or could you use something like a napkin or coloring page in the middle of the plastic?
heather
@Carla, the plastic melts to itself, but I’m not sure how it behaves with non-plastic material. The best way to find out is to test it out yourself! Let us know what you find out.
Bobby Taylor
Use PARCHMENT PAPER, not freezer paper. You will find it on rolls in the same section as freezer paper, ziploc bags and such. The parchemnt paper is used in baking to replace oils or shortenings for cookies, cakes and such to prevent sticking when baking.