
Daguerreotypes were the first type of photography; they were images printed onto polished silver so they are very reflective, like a mirror. For Halloween, I decided it would be fun to create a faux daguerreotype with a dollar store mirror. Using a transparent film, I was able to get the old-timey photography look for just a few bucks! Read on for instructions.
Project Materials:
- 8″ x 10″ Framed mirror, $1
- 1 sheet of Craft Attitude film, about $2
- Dark acrylic paint or antiquing glaze, on hand or $1 and up
- An old-timey photograph (I got mine at Graphics Fairy: Vintage Clip Art – Sisters)
- Craft knife (with a sharp blade), on hand
- Paint brush, on hand
- Tissue, on hand
Total: $3 and up
The secret ingredient to this project is Craft Attitude — a transparent printable film that works with your inkjet printer. (Check out another great Halloween project we made with Craft Attitude: Retro Fabulous Halloween Decorations).
How to Make a Faux Daguerreotype
1. Print your desired photo onto Craft Attitude film using your favorite photo editing program and your inkjet printer. Note: Because Craft Attitude prints on the reverse side of the film, don’t forget to flip the photo (it should be under printing options) as you print, if desired.
Fun Fact: Daguerreotypes were actually printed backward, so it’s kind of a nerdtastic touch to leave the image reversed, but if you have words in the image, you will want the image to print the correct orientation.
2. Clean the mirror with glass cleaner (or vinegar) and allow to dry.
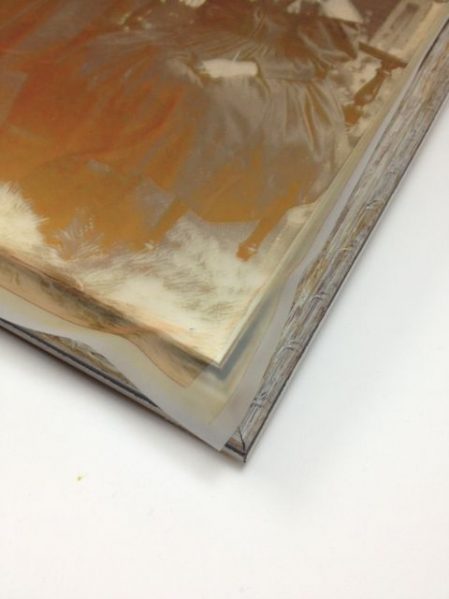
3. Gently lay the image down on the mirror, centering image, and avoid trapping air bubbles beneath. Usually you use glue with Craft Attitude, but I found that the film stuck right to my mirror with no adhesive. Because the film wanted to stick to the mirror, it was slightly tricky to get the film to lay perfectly flat with no air bubbles. Read the next step for a tip to deal with the bubbles.
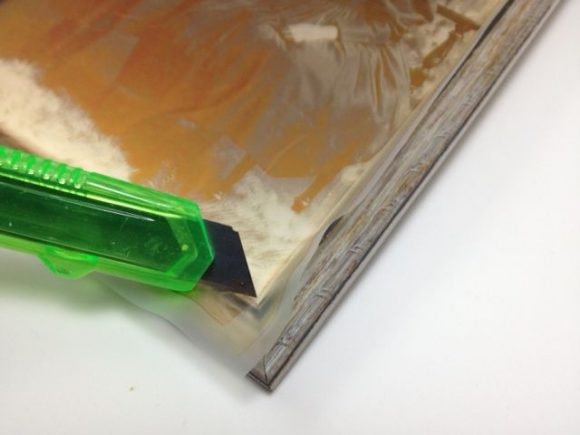
4. With a sharp craft knife (new blade is recommended!), trim the film right at the edge of the frame. Remove excess film.
Tip: Use a credit card to burnish the film, and work air bubbles out.

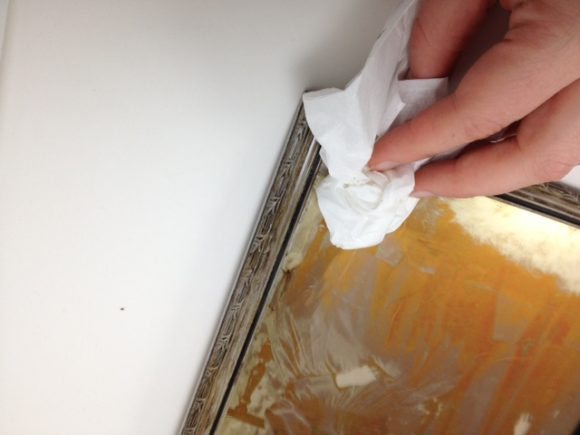
5. My next step was to antique the frame. I used antiquing glaze because it happened to be sitting on my desk, but you can also use dark acrylic paint (black or brown).
To antique: paint a thick-ish layer of antiquing glaze or paint onto the frame, then wipe most of it off with a tissue. I also added some splotches of antiquing gel around the edges and corners of the picture to dirty it up a little and make it look a little older.
6. Let the frame dry, and you’re done!

I made this project as part of the Halloween Blog Hop for Craft Attitude. Be sure to check out the other great projects!
I’m the last stop on the blog hop! Here are all the stops:
- Jonathan Fong
- Lisa Fulmer
- Theresa Cifali
- Kristi Parker Van Doren
- Jennifer Priest
- Ann Butler
- Heather Mann (you are here!)

Thanks for joining me!


11 Comments
Jennifer Priest
Love this so much!! You make the best projects ;)
Karen Watson
This is so cool!! I love it!!
Michaela
This looks cool! I think it would be fun to make it even more personalized and use the old timey photos you can get of yourself and friends/family in tourist towns and fairs and stuff!
Johanne L.
It’s a great technique. Love that look. Thanks for sharing,
Rhissanna
This actually came through on my facebook. Wow, what a brilliant idea. Just what I need for Hubby’s Steampunk Study! If you want to age the mirror first, there’s some cool tutes about.
Mr Harold Bowden
You used Craft Attitude film in this project. I’m not at all familiar with this product. When I go to their web site I’m presented an array of different products. Can you tell me which one specifically used? Please?
Debbie Craine
Love the look you achieved. Thanks for the inspiration.
Joelle
Heya,
I’ve recently discovered that you can use old-fashioned transparency film from overhead projectors similarly to this film mentioned above. I have a normal household ink-jet printer. I print out the image I want onto the transparency then carefully place it somewhere to dry/set for a couple of hours before using it. I find that it works great and you just can’t get it wet or the ink might smear. For this project it would work perfectly, just place your image face-down onto the mirror. Heat bond the plastic to the mirror with a heat gun or use spray adhesive. You can still push the air bubbles out without smearing. I happened to get a bunch of free transparencies when my office sorted through an old supply cabinet. I am sure there are a lot of packages still lying around to be found.
Brenda Young
AWESOME! I have to get this Stuff! Such a cool Project!